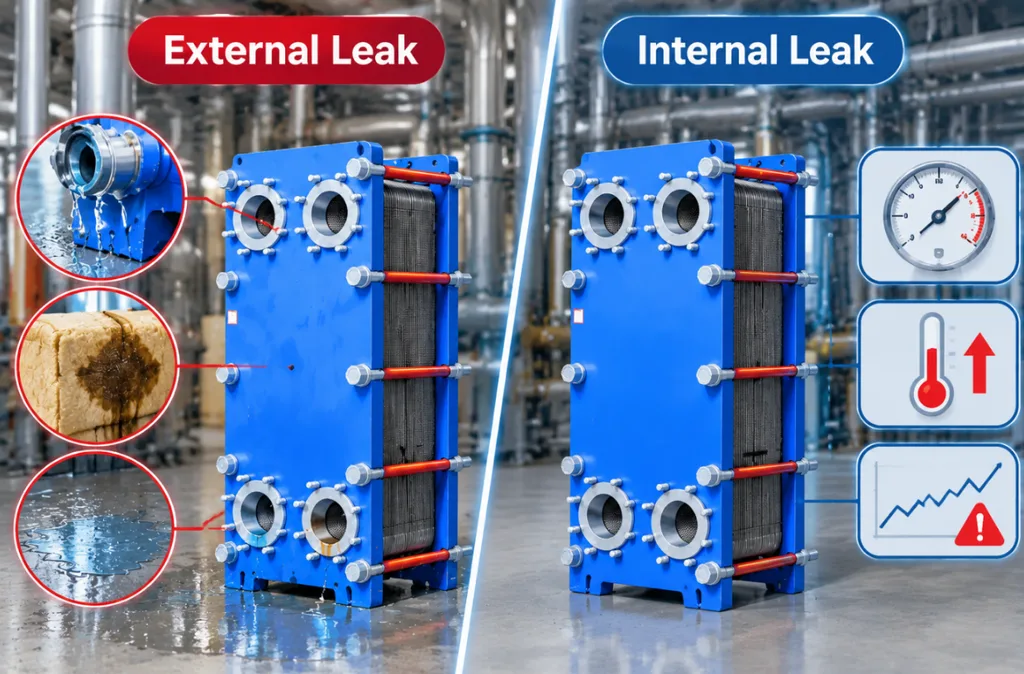
An external leak is honest: it drips on the floor, stains the insulation and points at itself. An internal leak does the opposite — the frame stays dry, the gaskets look new, and nothing seems wrong until the product, the cooling water or the process data says otherwise. They are two different failures with different causes, different consequences and different repairs. Treating one like the other usually wastes a shutdown: the parts ordered do not fix the problem, and the leak returns.
This guide explains how to recognize each type from the symptoms alone, how to confirm the diagnosis with simple tests, and what each result means for the repair decision.
Why the distinction matters
An external leak releases fluid to the atmosphere. It is usually visible — drips, stains, wet insulation — and the most common cause is a worn or wrongly specified gasket. Production can often continue for a short, planned period while parts are arranged.
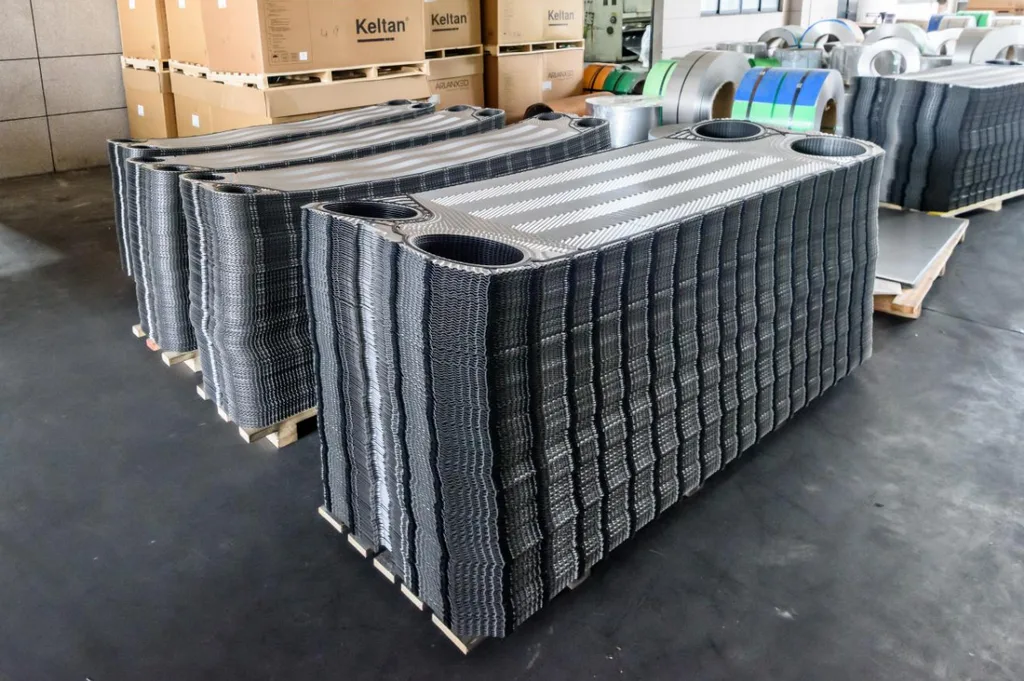
An internal leak lets the two circuits mix inside the unit. Nothing appears outside; the evidence shows up in the product, the cooling water or the process readings. The usual cause is plate damage — a pinhole, a crack or corrosion — and depending on the duty, an internal leak can be a product-safety event that requires an immediate shutdown. The repair paths are different as well. An external leak is typically a gasket replacement. An internal leak almost always involves replacement heat exchanger plates, and sometimes a complete plate pack. Diagnosing correctly before ordering is the difference between one shutdown and two.
External and internal leaks at a glance
Aspect
External leak
Internal leak
Where the fluid goes
To the atmosphere
From one circuit into the other
Typical evidence
Drips, staining, wet insulation, floor puddles
Contamination, conductivity or pH shift, unexplained level changes
Typical root cause
Gasket compression set, wrong compound, poor seating, over- or under-compression
Plate pinhole, crack, pitting or crevice corrosion, fatigue
Detection
Usually visual
Requires instrument readings or pressure tests
Urgency
Plan a repair at the next opportunity
Often immediate, duty dependent
Usual repair
Replace gaskets, re-compress to specification
Replace damaged plates, sometimes the complete pack
Recognizing an external leak
Where to look
The gasket line — the most frequent source. Look for a dark fluid trail running from between two plates down the frame.
Port areas — port gaskets and liner seals weep at the connection to the pipework.
Tightening bolts — fluid can wick along the bolt threads and appear at the nut, far from the actual leak point.
Under insulation — check beneath lagging on hot or chilled duties; stains and mineral deposits mark slow leaks that never form drips.
The paper pass — for weeps too slow to drip: wipe the seams dry, run the unit at normal temperature, then press fresh paper or cardboard along every gasket line and connection. A damp patch on paper locates a leak that a visual check will miss.
Common causes. Most external leaks trace back to the gasket: hardened or permanently compressed material, a compound that was never compatible with the fluid, or a gasket seated incorrectly after reassembly. Choosing plate heat exchanger gasket materials for the actual fluids and cleaning chemicals prevents most repeat leaks. Assembly method matters too — clip-on and glued gaskets fail in different ways, and a glued joint that was cured incorrectly tends to weep weeks later rather than immediately.
A caution before you blame the gasket. On chilled-water units, condensation on the frame mimics a leak perfectly. Wipe the area dry, mark it with chalk or a marker, and recheck after a few hours of operation. A true leak reappears in the same spot; condensation moves.
Recognizing an internal leak
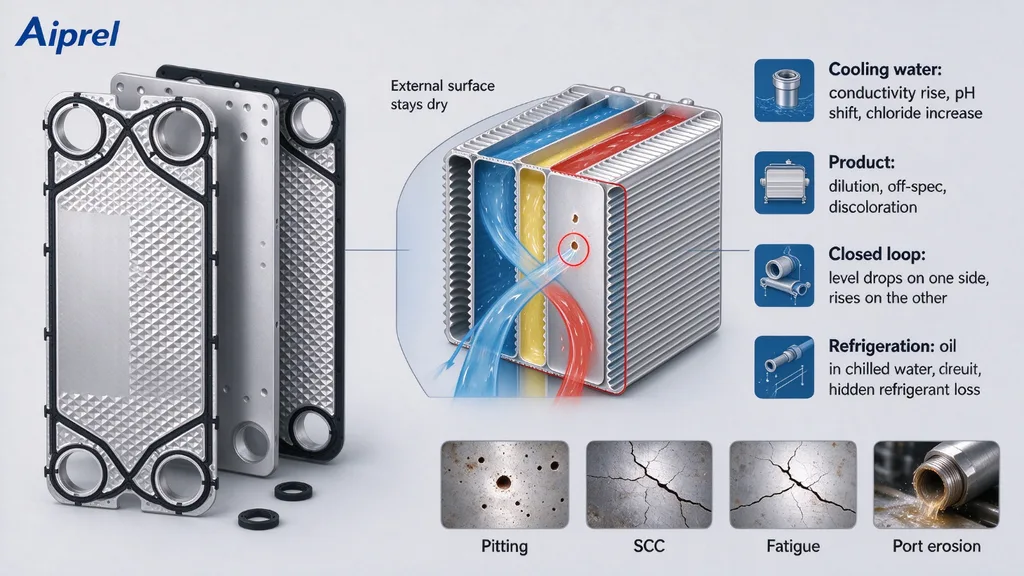
Internal leaks announce themselves in the process, not on the floor. The specific signs depend on which side contaminates which:
Cooling-water side contaminated: rising conductivity, a pH shift, an oil sheen on the cooling tower or basin, product traces or an unexplained chloride increase.
Product side contaminated: dilution or off-spec product, coolant traces, discoloration, off-odors. In food, beverage and pharmaceutical duties, this is a product-safety event.
Closed loops: the expansion-tank level of one circuit drops while the other rises, with no visible loss anywhere.
Refrigeration duties: oil appearing in the chilled-water circuit, or refrigerant loss that cannot be found at the pipework.
On the plate side, the usual causes are pinholes from pitting or crevice corrosion, stress-corrosion cracks (chlorides and stainless steel are the classic combination), fatigue cracks from pressure cycling, and erosion near the ports. Occasionally a damaged inter-port gasket allows mixing without any plate defect — one more reason to confirm before ordering plates.
And the cost is rarely the plate itself. It is the batch, the recall, the drain-and-flush, the customer complaint. In food, pharmaceutical, marine and chemical duties, one unnoticed cross-leak can write off more money in a day than the exchanger cost to rebuild.
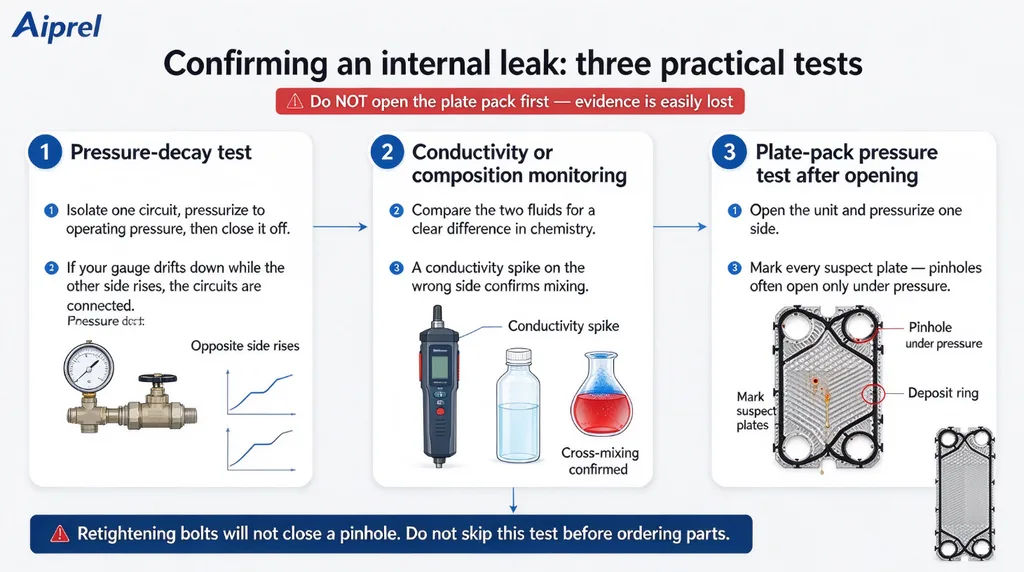
Confirming an internal leak: three practical tests
Work in this order, and do not open the plate pack first. Once the pack is loosened, the evidence is gone — wet marks, deposit rings and failed-gasket positions can no longer be read reliably.
1. Pressure-decay test. Isolate one circuit, pressurize it with water to its normal operating pressure and close it off. If the gauge drifts down while the other side’s pressure rises, the circuits are connected — the leak is internal. This test can be run without opening the unit.
2. Conductivity or composition monitoring. If both circuits carry fluids of clearly different chemistry (for example, deionized water against cooling water), a conductivity spike on the “wrong” side confirms mixing and can even indicate roughly how many channels are involved.
3. Plate-pack pressure test after opening. Open the unit and pressurize the pack on one side. Leaking plates reveal themselves by weeping or by a ring of deposits around the defect. Mark every suspect plate — do not assume there is only one. Pinholes that are invisible at rest often open under pressure, which is why a pack that “looks fine” can still fail this test.
Do not skip this step before ordering parts. A re-tightened pack will stop an external weep but will not close a pinhole — and a pinhole will keep contaminating the circuit no matter how tight the bolts are.
What each finding means for the repair
External leak, gasket worn: replace with gaskets matched to the exact plate. Review the replacement heat exchanger gaskets options and confirm both the profile and the compound for the duty.
External leak, port liner or frame corrosion: inspect the frame and connections as well — replacing gaskets on a corroded sealing surface rarely lasts.
Internal leak, one or two damaged plates: replace the affected plates with correct material and thickness. Mixing brands or patterns within one pack is not acceptable.
Exchanger model and manufacturer — or a nameplate photograph and measurements.
Which side leaks, and whether the leak is external or suspected internal.
When the symptom started, and whether it followed cleaning, reassembly or a process change.
Fluids on both sides with concentrations, plus normal and peak temperatures and pressures.
Details of any test already performed (pressure-decay results, conductivity readings, marked plates).
Cleaning chemicals and routine, since CIP conditions affect both gasket and plate life.
Contact Aiprel with the leak description and operating data — an engineer will confirm the failure type, the affected components and the parts list, typically within 24 hours of receiving the nameplate photo or measurements.
Frequently asked questions
Can an internal leak be fixed by re-tightening the plate pack? Only if the cause is insufficient compression at a gasket line. A pinhole or crack in a plate cannot be closed by compression, and re-tightening an already compressed pack can damage adjacent gaskets. Confirm with a pressure test before adjusting the closing dimension.
How urgent is an internal leak in a food or pharmaceutical duty? Treat it as immediate. Cross-contamination between a utility fluid and a product stream is a product-safety event regardless of the leak rate. Isolate the unit, confirm the test and replace the damaged plates before returning it to service.
The pack was opened and the plates look fine — yet it still leaks internally. Why? Microcracks and pinholes often stay closed at rest and only open under operating pressure and temperature. That is why the pack pressure test, not a visual check, is the deciding evidence.
Can we keep running with a slow external drip? It is a calculated risk, not a plan. Dripping fluid corrodes the frame and plates at the atmospheric side, wicks along bolts, and a weeping gasket can progress to a sudden blowout. Schedule the gasket replacement at the next available window instead of waiting for a forced shutdown.
Do both sides of the exchanger need the same gasket material? No. Each circuit contacts its own fluid, so each gasket position should be specified against the fluid it actually touches — including cleaning chemicals. The NBR, EPDM, HNBR and FKM comparison explains how to specify each side separately.
Conclusion
An external leak shows itself; an internal leak hides in the process data. Recognizing which one you have takes minutes and prevents ordering the wrong parts. Confirm external leaks at the gasket line, confirm internal leaks with a pressure test, and let the result — gaskets, plates or a pack decision — drive the purchase order. Guessing is the expensive part.
Get In Touch With Us
Need pricing? Need samples? Need support? Talk with our team in 24h.